



How to Use Klook
Planning a trip is exciting. Booking everything for it? Not always.
One minute you are looking for airport transfers, the next you have twelve tabs open comparing attraction tickets, train passes, local tours, and prices that seem to change from one website to another. That is exactly the problem platforms like Klook are designed to solve.
Klook brings a wide range of travel bookings into one place. Depending on your destination, you may be able to use it to reserve attraction tickets, guided tours, airport transfers, train journeys, car rentals, hotels, eSIMs, and other travel services before you leave home.
The platform is particularly well known among travelers visiting destinations across Asia, where its selection of attractions and transportation options can be especially useful. However, Klook has expanded well beyond Asia and now covers destinations around the world.
The platform itself is fairly easy to use, but first-time users still tend to have the same questions:
- How does booking on Klook actually work?
- Are the prices really cheaper?
- Where do you enter a promo code?
- What happens after you pay?
- Do you need to print your voucher?
- Can you cancel and get a refund?
- Is it safe to book expensive attractions through Klook?
This guide answers all of those questions.
We will walk through the entire process step by step, from creating your account and finding the right activity to applying discounts, checking cancellation terms, making payment, and using your voucher when you arrive.
We will also point out the details that are easy to miss.
That last part matters. Klook is convenient, but not every booking follows exactly the same rules. Cancellation deadlines, ticket collection methods, confirmation times, and refund conditions may differ from one activity or operator to another. Learning where to check those details before paying can save you a lot of frustration later.
By the end of this guide, you should know exactly how to use Klook and whether it makes sense for your next trip.
What Is Klook?
Klook is an online travel platform for discovering and booking things to do, places to stay, and transportation services.
The company was founded in 2014 and initially became especially popular for attractions and travel experiences across Asia. Over time, its offering expanded into more destinations and more types of bookings.
The easiest way to understand Klook is to think of it as a travel marketplace.
Klook does not personally operate every tour, attraction, rental car, or transfer shown on its website. Instead, the platform connects travelers with attractions, tour operators, transportation companies, accommodation providers, and other travel businesses.
You search for what you need, compare the available options, review the booking conditions, and pay through Klook. After the booking is confirmed, the details and voucher are normally stored in your Klook account and mobile app.
For many bookings, that means you can arrive with a digital voucher or QR code instead of buying a ticket at the entrance.
That convenience is one of the biggest reasons travelers use Klook.
Instead of searching separately for an airport transfer, theme park ticket, day tour, rail pass, and eSIM, you may be able to arrange several parts of the same trip through one account.
That does not mean Klook will always be the cheapest option. It also does not mean every activity has the same refund policy.
The real advantage is convenience combined with the ability to compare travel products before booking.
What Can You Book on Klook?
The exact selection changes by destination, but Klook currently covers several major travel categories.
Tours and local experiences
This is one of Klook’s strongest areas.
You can find:
- Guided city tours
- Day trips
- Food experiences
- Cultural activities
- Outdoor adventures
- Water activities
- Shows and events
In major tourist destinations, you may find dozens or even hundreds of options.
Attraction tickets
Klook is widely used for pre-booking admission to:
- Theme parks
- Observation decks
- Museums
- Aquariums
- Zoos
- Water parks
- Major landmarks
Some listings offer instant confirmation and mobile admission, although you should always check the individual product page before assuming this applies to your booking.
Airport transfers
Depending on the destination, you can book private or shared transfers between an airport and your hotel or another location.
This can be useful when arriving late at night, traveling with a family, carrying a lot of luggage, or visiting a destination where you would rather arrange transport in advance.
Trains and transportation
Klook also sells selected transport products, including train tickets and rail-related passes in supported destinations.
This is particularly relevant for trips in parts of Asia, where travelers often use Klook for airport rail services, regional transportation, and certain rail passes.
Car rentals
You can compare and reserve rental cars through the platform in supported locations.
As with any rental car booking, pay close attention to:
- Cancellation terms
- Deposit requirements
- Driver age rules
- Insurance
- Pick-up conditions
- Fuel policies
The headline price is only one part of the total rental cost.
Hotels and accommodation
Klook also offers hotel bookings.
However, travelers who are choosing a platform specifically for accommodation may still want to compare the final price and conditions with dedicated hotel booking websites before paying.
Travel eSIMs and connectivity
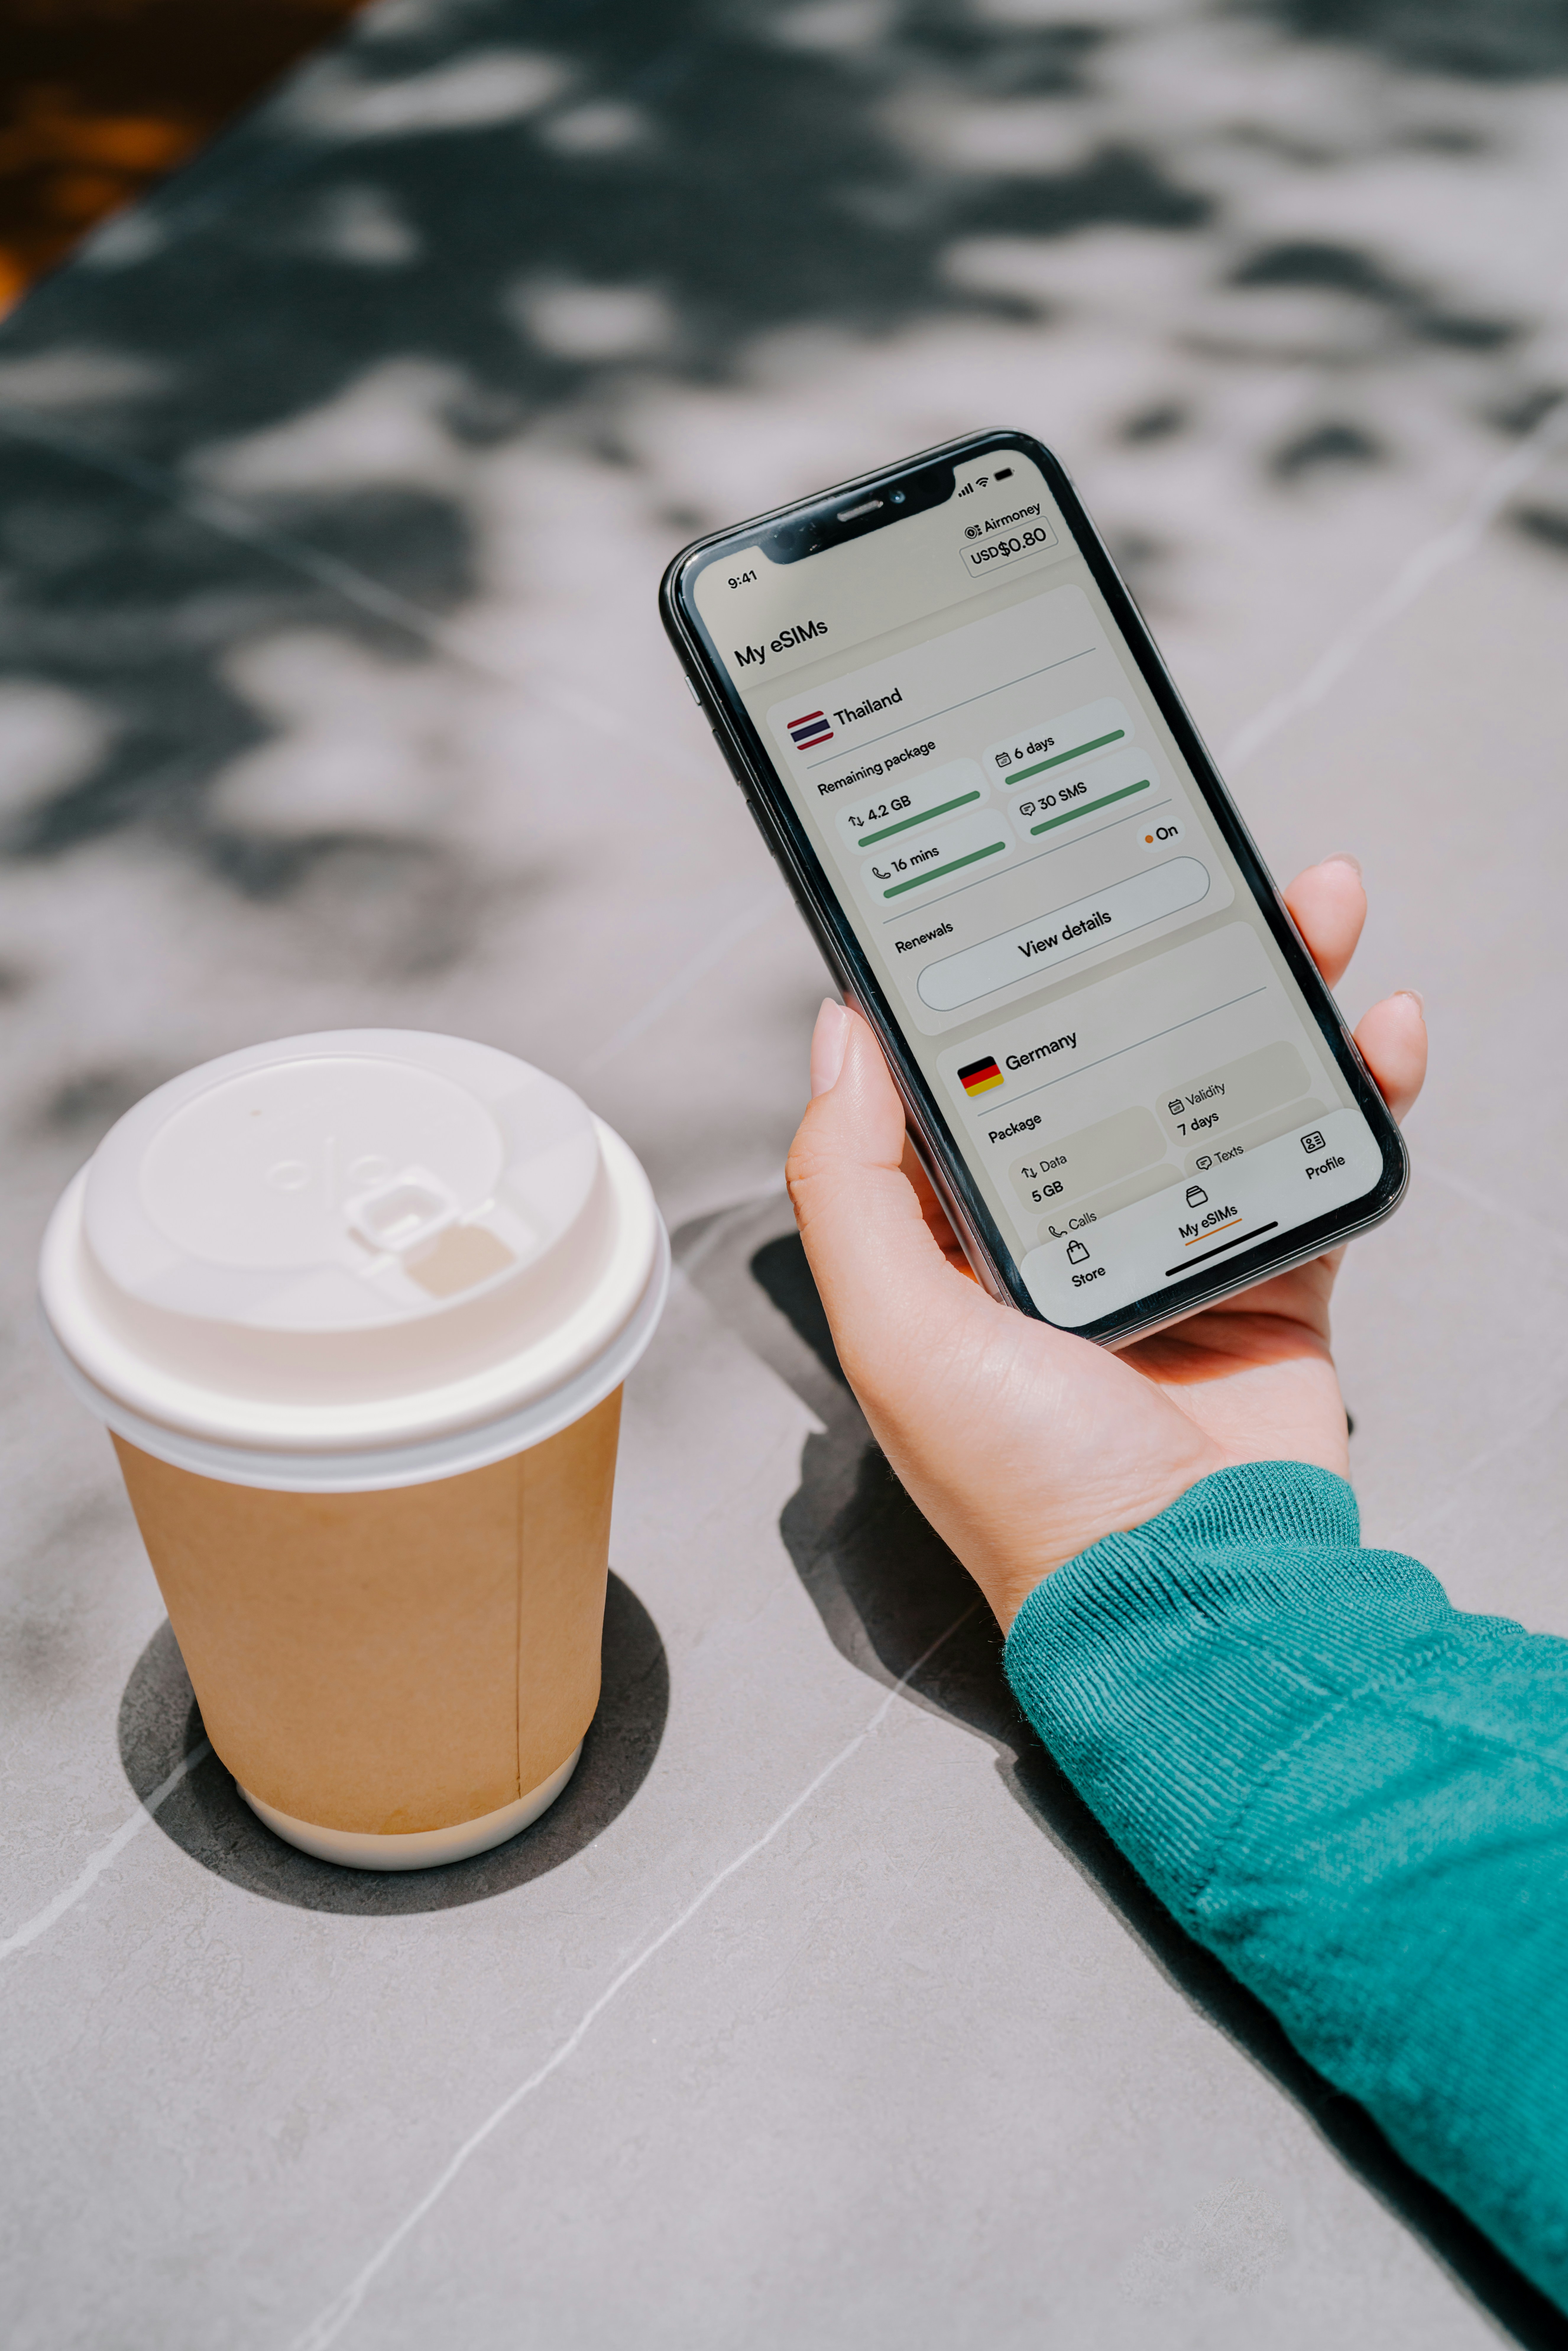
For supported destinations, Klook offers eSIMs and other connectivity products.
This can be convenient for travelers who want mobile data ready before or shortly after arrival without relying on expensive international roaming.
How Does Klook Work?
The basic process is simple:
- Search for a destination, attraction, or service.
- Choose a listing.
- Select your preferred date and package.
- Review the inclusions and booking conditions.
- Enter traveler information.
- Apply an eligible promo code.
- Pay for the booking.
- Receive your confirmation and voucher.
- Follow the redemption instructions for your booking.
The process itself usually takes only a few minutes.
The most important step is number four.
Before paying, always read:
- What is included
- What is not included
- The cancellation policy
- Confirmation details
- Voucher instructions
- Meeting or pick-up information
Two activities on Klook can have completely different booking conditions, even when they are in the same city.
For example, one attraction may offer free cancellation before a stated deadline, while another booking may be non-refundable from the moment you pay.
That is why experienced users do not treat Klook as if every product follows one universal policy.
They check the terms of the specific booking.
Who Is Klook Best For?
Klook is particularly useful for travelers who prefer organizing important parts of a trip before departure.
It can be a strong fit for:
- First-time visitors who want to book major attractions in advance
- Travelers visiting popular destinations in Asia
- Families arranging attraction tickets and transfers
- Travelers who prefer mobile vouchers over paper tickets
- People looking for tours and local experiences
- Travelers who actively compare discounts and promo codes
- Anyone who wants several types of travel bookings in one account
Klook can also be useful for spontaneous travelers. Some activities offer quick or instant confirmation, which may make last-minute booking possible.
However, it may be less suitable for someone who prefers arranging everything directly with local providers or who expects every booking to have the same flexible cancellation policy.
The key is to use Klook as a comparison and booking tool—not to assume that every listing is automatically the best deal.
Compare the final price, read the terms, check recent customer feedback, and only then decide whether to book.
For many travelers, that extra minute of checking is the difference between a smooth experience and an avoidable problem.
Before You Start: What You Need to Use Klook
Before making your first booking, it helps to have:
- A working email address or supported sign-in account
- A valid payment method
- Your travel dates
- The names of travelers if required
- A phone with access to your booking voucher
- A few minutes to review the cancellation and redemption terms
You do not need to be an experienced traveler to use Klook.
The next section will walk you through creating your account and setting it up correctly before making your first booking.
How to Create a Klook Account
Creating a Klook account is straightforward, but it is worth setting things up properly before making your first booking.
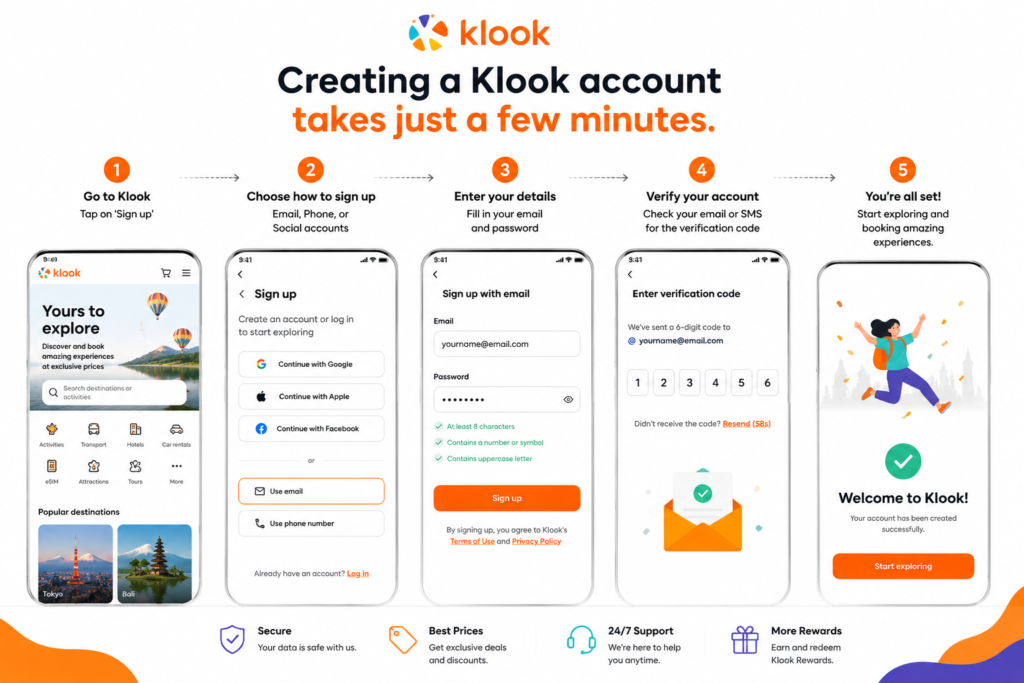
You need a Klook account to book activities through the platform. You can currently register using an email address or phone number, or sign in through supported third-party accounts such as Google, Apple, Facebook, or WeChat.
The entire process should only take a few minutes.
Our advice, however, is not to rush straight into your first booking.
A little preparation now makes it easier to find your vouchers, manage cancellations, receive booking updates, and access your reservations while traveling.
How to Sign Up for Klook on the Website
To create an account from a desktop or mobile browser:
Step 1: Open the Klook Website
Go to the official Klook website.
Look for the Sign up or account option near the top of the page.
Klook may adjust the exact appearance of its website over time, but the account and sign-in controls are normally available from the main navigation.
Step 2: Choose How You Want to Sign Up
You may be given several registration options.
These can include:
- Email address
- Phone number
- Apple
The available third-party options can vary slightly depending on your device, location, or version of the platform. Klook’s official help center currently lists email, phone number, Facebook, Google, Apple, and WeChat as supported account methods.
For most travelers, we recommend using either:
A personal email address you check regularly, or
a Google or Apple account you expect to keep long term.
Why?
Because your Klook account becomes the central place for your bookings, vouchers, payment records, and travel details.
Using a temporary email address—or an account you rarely check—can create unnecessary problems later.
Step 3: Complete the Registration Process
The next step depends on the method you choose.
Signing Up With an Email Address
If you choose email registration:
- Enter your email address.
- Create a password.
- Complete the sign-up process.
- Open your email inbox.
- Follow the account activation instructions.
Klook’s official instructions state that email users should activate their accounts through the email sent after registration.
Before continuing, double-check the spelling of your email address.
A simple typo can become a major inconvenience if an important booking confirmation or account message is sent to the wrong address.
Signing Up With a Phone Number
You can also register using a supported phone number.
The general process is:
- Enter your phone number.
- Request a verification code.
- Enter the code you receive.
- Create your password.
- Log in to the account.
This method can be convenient, but make sure you will still have access to the number while traveling.
If your trip involves changing SIM cards or using a temporary travel eSIM, consider whether email-based access may be easier for you in the long term.
Klook’s current help documentation confirms that phone registration uses a verification code before the account is created.
Signing Up With Google, Apple, Facebook, or WeChat
Third-party login is usually the fastest method.
Choose the service you want to use, sign in, and follow the authorization steps shown on screen.
The advantage is convenience. You do not have to remember a separate Klook password.
The downside is that your future access depends on remembering which login method you originally used.
This sounds obvious, but it is surprisingly easy to forget.
A traveler might create an account with Google, then return months later and try to log in manually using the same email address. Depending on how the accounts were created, this can cause confusion.
Our simple rule is:
Choose one login method and keep using it consistently.
How to Create a Klook Account in the App
The process is similar in the mobile app.
According to Klook’s current instructions:
- Open the Klook app.
- Go to the Account section.
- Select the sign-up option.
- Choose your preferred registration method.
- Complete the required verification or login steps.
Once your account is active, you can use it to manage your bookings through the app.
For travelers, the app can be especially useful once the trip begins.
You may need to check:
- Booking confirmations
- Vouchers
- QR codes
- Meeting points
- Pick-up instructions
- Activity times
- Cancellation details
That is why we recommend installing and logging into the app before leaving home, rather than waiting until you are standing outside an attraction or arriving at an airport.
Which Sign-Up Method Is Best?
There is no single best method for everyone.
However, this is how we would choose.
Use Email If You Want Maximum Control
Email is a good choice if you prefer keeping travel reservations in one inbox.
It can also make it easier to search for booking-related messages later.
Use an address that:
- You check regularly
- You can access abroad
- Is protected with a strong password
- Is not temporary
- Has enough storage space
A dedicated travel email address can work well for frequent travelers, but only if you actually monitor it.
Use Google or Apple If You Prefer Convenience
A third-party account can make login faster.
This may be the easiest choice if you already rely on Google or Apple across your devices.
Just remember which method you used.
We recommend adding a quick note to your password manager such as:
Klook login: Continue with Google
That five-second note can save time months later.
Use a Phone Number Only If You Will Keep Access to It
Phone registration can work perfectly well, but frequent international travelers should think ahead.
Ask yourself:
- Will I still own this number next year?
- Can I receive verification messages abroad?
- Will I change SIM cards during the trip?
- Is the number linked to my primary device?
The easier your account is to recover, the better.
Important Account Setup Tips Before Your First Booking
Creating the account is the easy part.
The next few details are what make the booking experience smoother.
1. Use Your Real Contact Information
Do not create the account using random or disposable details.
You may need access to booking confirmations, security codes, cancellation updates, or customer support messages.
Keep your main contact details accurate.
2. Make Sure You Can Access Your Account Abroad
Before traveling, log out and log back in at least once.
This simple test helps confirm that:
- You know your login method.
- You remember your password.
- You can access your email.
- Your verification method works.
It is better to discover a login problem at home than outside a busy airport after a long flight.
3. Keep All Important Bookings in the Same Account
Try not to create separate Klook accounts unless you have a genuine reason.
Keeping your travel bookings together makes it easier to review:
- Upcoming reservations
- Previous bookings
- Vouchers
- Cancellations
- Refund-related information
It also reduces the chance of looking in the wrong account for a missing booking.
4. Install the App Before Your Trip
Even if you prefer booking from a computer, having the app ready on your phone can be useful.
Log in before departure and confirm that your upcoming bookings appear correctly.
Then open each important reservation and check:
- The booking date
- Number of travelers
- Confirmation status
- Voucher instructions
- Redemption method
- Meeting location
Do not assume that every activity works the same way.
One booking may allow direct entry with a QR code.
Another may require you to visit a ticket counter.
A third may require advance contact with the local operator.
The instructions attached to your specific booking are more important than any general advice.
5. Take Screenshots of Essential Vouchers
Internet access is not guaranteed.
Mobile data can fail. Airport Wi-Fi can be unreliable. A travel eSIM may not activate immediately.
For important time-sensitive bookings, consider saving the essential information somewhere you can access offline.
This may include:
- Voucher
- QR code
- Booking reference
- Meeting point
- Emergency contact details
However, always check the voucher instructions first. Some bookings may have specific requirements for how the voucher must be presented.
Do You Need an Account Before Booking?
Yes, Klook’s official help center currently states that users need an account to book an activity through the platform. Registration is available through email, phone number, or supported third-party accounts.
This is useful because your bookings can then be associated with your account rather than existing only as isolated confirmation emails.
Once logged in, you can move on to the part that matters most:
finding the right activity.
And this is where many first-time users make their first mistake.
They search for a destination, see a highly rated option, look at the headline price, and book too quickly.
A better approach is to compare the package, not just the listing.
Two packages for the same attraction can include very different benefits, entry times, transportation options, cancellation terms, and final prices.
In the next section, we will show you how to search Klook properly, compare listings, understand package options, and avoid choosing the wrong ticket.
How to Search and Find the Best Activities on Klook
Finding an activity on Klook is easy. Finding the right activity takes a little more attention.
Many first-time users simply search for a destination, click on the first result, and complete the booking within a few minutes. While that approach may work, it is not always the smartest one.
Activities that appear similar at first glance can differ significantly in price, inclusions, cancellation policies, meeting points, operating hours, and customer ratings.
Spending just a few extra minutes comparing your options can help you save money and avoid unpleasant surprises later.
Step 1: Search for Your Destination or Activity
Start by entering the name of your destination, attraction, or activity into the search bar.
For example, you can search for:
- Tokyo Disneyland
- Universal Studios Japan
- Eiffel Tower
- Airport Transfer Bangkok
- Mount Fuji Tour
- JR Pass
As you type, Klook will display matching suggestions to help you find popular attractions more quickly.
If you’re not sure what to search for, simply enter the name of the city you are visiting. Klook will then display categories such as attractions, experiences, transportation, and local tours available in that destination.
Step 2: Use Filters to Narrow Your Results
Once the search results appear, avoid selecting the first option immediately.
Instead, use Klook’s filters to find activities that match your preferences.
Depending on the destination, available filters may include:
- Price
- Rating
- Duration
- Instant Confirmation
- Free Cancellation
- Time Slot
- Category
- Language
- Availability
Applying filters can dramatically reduce the number of irrelevant listings and make comparing activities much easier.
For example, if your trip is only one day long, selecting shorter activities will save valuable time.
Step 3: Compare More Than Just the Price
One of the biggest mistakes beginners make is choosing the cheapest option without checking what is actually included.
A lower price does not always mean better value.
Before booking, compare:
- What’s included
- Meeting location
- Transportation
- Tour duration
- Entry tickets
- Guide language
- Hotel pickup
- Meals
- Cancellation policy
Sometimes paying a few dollars more includes transportation or skip-the-line access, making the overall experience much better.
Always compare the complete package—not just the headline price.
Step 4: Read the Activity Description Carefully
Every activity page contains detailed information that many travelers skip.
Take a few minutes to review:
- Activity highlights
- Itinerary
- Important information
- Exclusions
- Age restrictions
- Accessibility
- Weather requirements
- Redemption instructions
This section often answers questions that travelers only think about after completing their booking.
Step 5: Check Customer Reviews
Customer reviews provide valuable insight into what you can realistically expect.
Rather than focusing only on the overall star rating, spend a few minutes reading recent reviews.
Pay particular attention to comments about:
- Organization
- Tour guides
- Waiting times
- Transportation
- Value for money
- Communication
- Cleanliness
- Overall experience
Recent reviews are often more useful than older ones because they better reflect the current quality of the activity.
Step 6: Understand Package Options
Many activities offer several booking packages.
For example, one attraction may include:
- Standard Admission
- Fast Track Entry
- VIP Experience
- Admission + Transportation
- Family Package
Although these options appear on the same listing, they can differ significantly in both price and benefits.
Before selecting a package, compare exactly what each option includes.
The cheapest package is not always the most suitable one.
Step 7: Check Availability Before Planning Your Day
Some attractions operate on fixed schedules or require reservations for specific time slots.
Always confirm:
- Available dates
- Entry time
- Duration
- Last admission
- Seasonal closures
This is especially important during holidays and peak travel seasons, when popular attractions can sell out quickly.
Common Mistakes to Avoid
Many booking problems are caused by small mistakes that can easily be avoided.
Here are a few examples:
- Booking the wrong date.
- Choosing the wrong meeting point.
- Ignoring cancellation deadlines.
- Assuming hotel pickup is included.
- Not checking voucher redemption instructions.
- Selecting the cheapest package without comparing inclusions.
Taking an extra five minutes to review these details can save both time and money during your trip.
How to Book an Activity on Klook: Step by Step
Once you have found the right activity, completing a booking on Klook usually takes only a few minutes. The exact options can vary by listing, but the general process is straightforward.
Step 1: Choose Your Date and Package
Open the activity page and select your preferred travel date.
If several packages are available, compare them carefully before choosing. Check what is included, the entry method, transportation options, cancellation terms, and any additional fees.
Do not assume the cheapest package includes everything shown on the main activity page.
Step 2: Select the Number of Travelers
Choose the correct number of adults, children, or other ticket types.
Pay attention to age requirements. Some attractions use different definitions for child, student, senior, or infant tickets.
Entering the wrong ticket type could cause problems when redeeming your voucher.
Step 3: Review the Booking Details
Before continuing, check:
- Travel date
- Time slot
- Number of travelers
- Package selected
- Meeting or pickup location
- Cancellation policy
This takes less than a minute and can prevent most common booking mistakes.
Step 4: Enter Traveler Information
Some bookings require only basic contact details, while others may ask for traveler names, passport information, flight details, or hotel information.
Enter all details exactly as requested.
For transport bookings in particular, double-check flight numbers, arrival times, and pickup locations before submitting the reservation.
Step 5: Apply a Promo Code
If you have an eligible Klook promo code, enter it before completing payment.
Always check the final total after applying the discount. Promo codes can have restrictions based on destination, activity type, minimum spend, account status, or payment method.
Solvfly Tip: Check the latest Klook deals on SolvFly before paying. A valid discount can sometimes make an already competitive booking even better.
Step 6: Complete Payment
Choose one of the available payment methods and review the final price.
Before clicking the final payment button, make sure you understand:
- The total amount charged
- The currency used
- Whether the booking is refundable
- Whether confirmation is instant or pending
Once everything looks correct, complete the payment.
Step 7: Check Your Confirmation and Voucher
After booking, open your Klook account and confirm that the reservation appears under your bookings.
Check the booking status and read the voucher instructions carefully.
Depending on the activity, you may need to:
- Show a mobile QR code
- Present your passport or ID
- Exchange the voucher for a physical ticket
- Meet a guide at a specific location
- Contact the operator before arrival
Never assume that the payment confirmation alone is enough for entry.
Before You Leave
For important bookings, save the essential details on your phone before your trip.
We recommend keeping:
- The voucher or QR code
- Booking reference
- Meeting point
- Activity time
- Local contact information
A screenshot can be useful when internet access is unreliable, although you should always follow the redemption instructions shown on the specific booking.
The Most Important Rule
The Klook booking process itself is simple.
The part that deserves the most attention is everything before you press the final payment button.
Check the date, package, cancellation terms, and redemption instructions one final time. Those few seconds can prevent the majority of avoidable booking problems.
Cancellation, Refunds & Final Booking Tips
Before completing any Klook booking, take a moment to check the cancellation policy.
This is one of the most important details to understand because Klook does not use one cancellation rule for every activity. Some bookings offer free cancellation until a stated deadline, while others may be non-refundable or subject to specific conditions. The policy shown on the individual activity page and in your booking details is the one that matters.
How to Cancel a Klook Booking
If your booking is eligible for cancellation, you can usually manage the request through your Klook account.
The process is generally:
- Open your Bookings page.
- Select the reservation you want to cancel.
- Check the Cancellation Policy.
- Choose Apply for refund if the option is available.
- Select the reason and follow the instructions.
For bookings with conditional cancellation, Klook may review the request rather than approving it automatically. If the refund option is unavailable, you may need to contact customer support through the booking page.
Will You Get a Full Refund?
That depends entirely on your booking terms.
If an activity includes free cancellation and you cancel before the stated deadline, Klook says you can receive a full refund. Once that deadline has passed, the booking may no longer be refundable.
This is why you should never rely on a general assumption such as:
“I booked through Klook, so I can cancel anytime.”
Instead, check the exact terms before payment.
For expensive activities or plans that may change, a slightly higher price with flexible cancellation can sometimes be more valuable than the cheapest non-refundable option.
How Long Do Klook Refunds Take?
Refund timing varies depending on the original payment method and the policies of your bank or payment provider.
Klook’s official help center lists different processing times for different methods, with some refunds taking only a few days and others taking several business days or longer. Bank transfers can take longer in some cases.
After cancelling, keep:
- The cancellation confirmation
- Your booking reference
- Any refund confirmation emails
If the expected processing period has passed and the money has not appeared, check with your payment provider and contact Klook support from the affected booking.
Final Booking Tips
Klook is easy to use, but the best booking experience comes from slowing down for one final check before paying.
Always confirm:
- The correct travel date and time
- The exact package you selected
- What is included and excluded
- The cancellation deadline
- The meeting or pickup point
- How the voucher must be redeemed
- The final price after discounts
For important bookings, save the voucher and essential instructions somewhere you can access them during the trip.
The most common problems are often caused by small details: the wrong date, an overlooked meeting point, a missed cancellation deadline, or confusion about what a package actually includes.
A two-minute review before checkout can prevent all of them.
Final Thoughts
Klook can make planning a trip much easier, especially when you want to book attractions, tours, transfers, and other travel services in one place.
The platform itself is not difficult to use. The real skill is knowing how to compare listings, choose the right package, understand the booking conditions, and check the details before paying.
That is the approach we recommend.
Search carefully. Compare more than the price. Read the cancellation terms. Check your voucher. Then book with confidence.
With those habits, you should now have everything you need to make your first Klook booking without the usual beginner mistakes.